Shea Moisture Review

Monday, October 14, 2013

I recently used a new Shea Moisture product that I noticed a fellow YouTuber using. I had just ran out of the curl enhancing smoothie that I normally use so I figured why not?! The product I am referring to is the Shea Moisture Kids Curling Butter Cream. 

Pros:
Moisturizing but not too heavy
Great hold yielding all day definition
A more slippery and thin consistency

Cons:
The price comparing the amount of product to the curl enhancing smoothie

For a more in depth review watch my video below 


disclaimer: all of these products were paid for with my own money and I was not asked to do this review.


Twist Out Gone Bad!

Wednesday, August 7, 2013

I did a twist out, mind you I dislike twist outs, and it did not come out to my liking. Because I was in a rush to get to work I just did this super quick and easy style. Enjoy!!


These Are A Few Of My Favorite Things

Tuesday, July 23, 2013


SKIN


I discovered bentonite clay a couple of years ago and it is such a great product for your skin as well as your hair. I was not able to fully reap the benefits of bentonite clay until I used this facial steamer. Using the steamer lets me open up my pores allowing the face mask to really get out all of the gunk! They are both very cost efficient and great items to add to your collection.
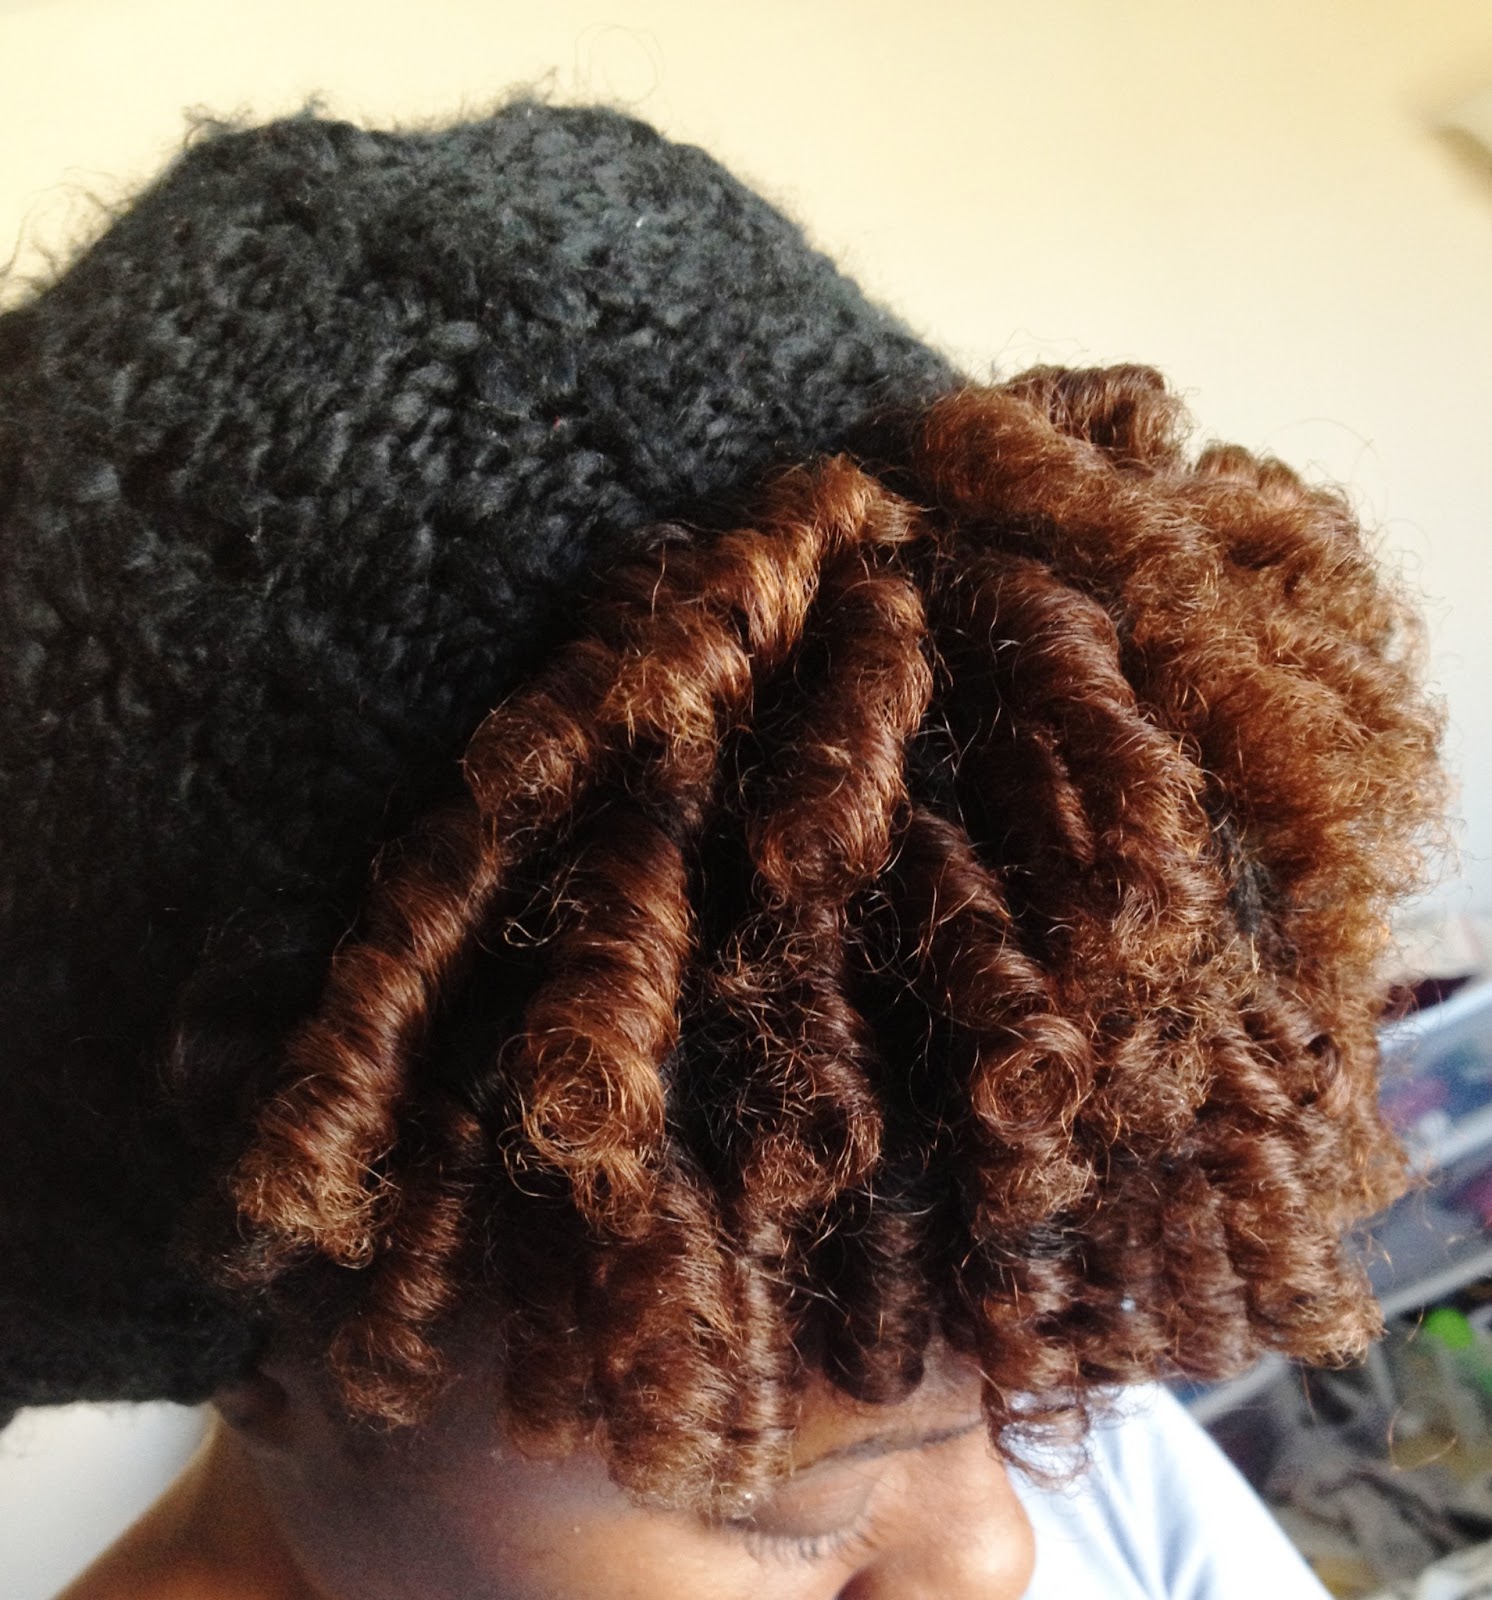
HAIR


The Tangle Teezer is the only brush that can truly tame these kinks, try it out for yourself!

Coconut Oil, hands down the best oil EVER! I use it on my skin, hair, and nails. Leaves great shine, makes for a great pre-poo, detangler, and moisturizer. It also promotes nail growth when rubbing it on your cuticles daily. Not to mention it smells AWESOME and everyone will notice.  

Argan Oil is a must have! It gives great shine, fights frizz, and leaves a smooth and polished finish. I usually apply it on wet twist outs after I've applied my moisturizers. 

Burnt Sugar Pomade by Oyin Handmade, which might I add is such an AWESOME brand, is not my most used product but still a favorite. Because it's a humectant I apply it to my wet ends so that they can retain a lot of moisture that they need.

Tresemmé Naturals Conditioner is cheap and effective, nuff said. 

Dark & Lovely Au Naturale Soufflé is my new favorite styler but it has it's limitations. As far as the style and hold it's A1, but this product lacks moisture for me. I cannot set my hair every night with this product but for the first couple of days it does what it's supposed to do!!

Shea Moisture Curl Enhancing Smoothie was the first product I purchased when I did my big chop almost 3 years ago. It's moisturizing and cheap. The only thing I do not like is how heavy it is. It also does not have great hold so a gel type of product is usually applied with it.

BEAUTY


These are my daily essentials!!

Carmex really needs no explanation. I've played around with Burt's Bee's and all the other cute chap sticks but I just took it back to what works. 

Maybelline's Falsies Mascara is a new favorite until I find the next one. My lashes are naturally longer so the affect of having false lashes on is super fun.

Milk of Magnesia is indeed intended to be ingested BUT the beauty gods have said otherwise. To my oily skinned beauties this stuff is truly a godsend. 

MAC Select Cover-Up Concealer is what I use to define my brows. It also helps out with my dark under eye areas as well as any other dark spots on my face. I like to use a concealer that is closer to my skin tone because I personally do not care for the all around highlighted look on my brows. 

Maybelline Matte Eyeshadow is what I use for my eyebrows. This is my most recent eyebrow experiment. I've used pencils from MAC, covergirl, Sonia Kashuk and a shadow from MAC but to no avail. I want to find a cost-efficient favorite already! For now this works!

MAC 242 Shader Brush was introduced to me by a MAC make-up artist. I use it to define my brows with the MAC select cover-up concealer.

xoxo, Cae

www.Itsohcaetolove.com

Monday, July 22, 2013

Itsohcaetolove, not only what I go by on social networks but also a reflection of oneself. Whether you are big or small, light or dark, have natural or processed hair, it is always important to love who you are!! My blog is now under www.itsohcaetolove.com! 

Check out my latest video of my versatile side twist bun! 


xoxo, Cae


Tuesday, July 16, 2013


Once again my hair is straight! To be quite honest I enjoy my straightened hair more than I do in its natural state. The reason being is because it is less time consuming. Because my strands are very fine it does get oily/greasy very fast which is such a pain in the butt. I have allowed my straight hair to last a couple weeks. Oh the joy of going to bed and waking up without having to do much!


I made about 6-7 plaits in my hair to achieve this wavy look. It made me feel some kind of way because it was like a bootleg and flatter version of my typical braid out.


And once again here we have the life saver. The "put your scarf on at night and do absolutely nothing in the morning" style. Two braids going back and pinned into a little side bun. A cute and effortless summer style. 

Ciao!

xoxo, Cae

My Homemade Body Butter

Monday, April 22, 2013


 I have been ranting and raving about the body butter I make and how great it so I finally have the time to post the recipe and directions for everyone. For me this recipe always makes 16 oz and all of the items are priced differently at different places so shop around. It is so great because I know exactly what is in it and it makes my skin feel amazingggg.. like, what is lotion? Anyways let's get to it. 

What you will need 
measuring cup
double boiler
bowl
electric food mixer
1 cup Shea Butter (amazon or beauty supply)
1/2 cup extra virgin coconut oil (trader joes)
1/2 cup carrier oil of your choice (gnc or vitamin shoppe)
(sweet almond, jojoba, grapeseed, avocado, etc.)
1/2 tsp vitamin e (natural preservative) (vitamin shoppe)
about 10 drops of an essential oil for light fragrance (vitamin shoppe)


Since I do not have a double boiler I made one of course, using a pot filled with water low enough to not touch the steel bowl. The steam from the water will allow the shea butter to melt. Continue to let it melt and transfer to your measuring cup using an oven mitt (please don't burn yourself). Once you get to 1 cup transfer into a separate bowl. If your coconut oil is still solid repeat the same step until you get to 1/2 cup and transfer to the bowl.


add one or mix your carrier oil(s) in the measuring cup until you reach 1/2 cup and transfer it to the bowl of shea butter and coconut oil. Add your vitamin e and essential oils to the bowl and mix thoroughly. Stick that bad boy in the freezer for no more than 10 minutes.


 Yea, so I got caught up eating and left it in the freezer for a little too long but I let it sit for about 15 minutes and proceeded to mixing. It's important that you DO NOT try to manually hand mix this because the results will not be the same. The more you mix the fluffier and pale it will become. 


Voilà! So easy to make and very cost-efficient. Your body heat will allow it to melt in your hands and go on somewhat like an oil but it soaks into your skin so perfectly. I usually use this on my body at night right after a shower and my skin holds its moisture the entire next day. Enjoy!!


*good places that you can purchase the items are online, whole foods, trader joe's, vitamin shoppe, gnc, or other health stores.

Hi, my name is Sue

Monday, March 25, 2013


I have been wanting to do a roller set for a LONG time now because I have not done it since my transitioning days. Granted, it did not come out exactly how it did back then but good enough for my first time on completely natural hair. 


my hair was freshly co-washed and still wet when I applied my moisturizer and setting lotion using these size rollers.


pay close attention to the hat, because that is where the disaster took place. If it wasn't the granny stuck to my head curls then it was the hair that decided not to dry. Although I was so ready to just wash my hair I refused to let the greatness of the front go to waste. Pinning it up and separating the twists I was left with a great updo! 


xoxo, Cae

Braid Take Down!

Tuesday, March 12, 2013

Taking down braids can be a true pain but don't let the frustration cause you to treat your hair like crap! I've taken down braids on my permed hair but dealing with natural hair is an entirely different story. If you did not have your hair blow dried or straightened before adding extra hair take extra care during the take down.

What you'll need
spray bottle with water 
cheap conditioner
wide tooth comb 
rat tail comb
clarifying shampoo
deep conditioner
leave-in conditioner

(Your hair WILL shed more than usual, remember that our hair sheds about 100 strands a day)

1. Part your hair into about 6 sections making sure not to make them too big.
2. Lightly spritz your hair with water and add a generous amount of conditioner from root to tip.
3. Starting from the bottom to the top begin to detangle your hair with the wide tooth comb. Once it begins      to feel easier to detangle switch to a rat tail comb.
4. Twist the section up once you are done detangling.
5. Head to the sink or shower and shampoo your hair section by section making sure to remove all build up. Twist hair back after each section is thoroughly rinsed. 
6. Deep condition! I used the same deep conditioner in my previous post but I added an egg for some extra protein!
7. Wash that bad boy out with a conditioner (I really want to try Pantene's Co-Wash Cleansing Conditioner)
8.  Add your leave-in, detangle once more to make sure you have all shed hair out. 
9. STYLE AS USUAL!

Thursday, February 21, 2013

I have been really lazy with these braids this go around, possibly because I miss the heck out of my curls.

I'm not too fancy but here is a little inspiration.

Let's Get It Straight!

Tuesday, January 1, 2013


Let's talk straight hair! I want to begin by saying it was super spur of the moment and decided I wanted to get it done the day of. My hair was still in need of a dire trim following my last session this past summer. Slowly but surely I am ridding those dead ends, ugh! As you can see in the photo above I still have some more to go but the stylist layered my hair until I go back. 

*deep sigh* I do worry about heat damage but at the same time hair grows back and I actually LOVED my hair straight this time around contrary to my previous post. To try avoiding heat damage make sure that you use a heat protectant. Grape seed oil is said to make for a great alternative if you naturals don't want to go out and spend extra money on a new product.


I was not expecting it to be as full and straight but I am impressed and enjoyed the health of my natural hair. No special treatment was done to my hair to achieve this look just a wash, condition, detangle, blow dry, and flat iron. 


When my hair got old*, and it did really fast, I did this cute & quick style. It's so weird that it feels foreign doing my hair in straight hairstyles. 

I am now prepping for braids (singles).

Be blessed & Happy New Year Y'all!

*old hair simply means oily & stringy.